Table of Contents
Initial commissioning
After installing and connecting the VP75 is ready for initial commissioning. The first few steps will prepare your VP75 for its day-to-day duty:
- Make sure that no foreign objects are left in the build chamber (transport locks, tools or the like).
- Close the build chamber.
- Toggle the main switch to <I> (ON).
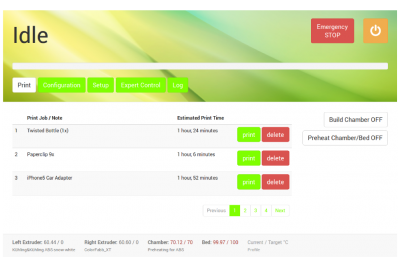
When the power supply is switched on the machine will boot automatically. Please wait patiently until the full operating screen is loaded on the touch screen at the machine front. The screen displays the Print screen and the top-left status message reads Idle.
Loading material
First, filament must be fed into the machine:
- Unpack the filament and cut the material's tip so that it is smooth and even.
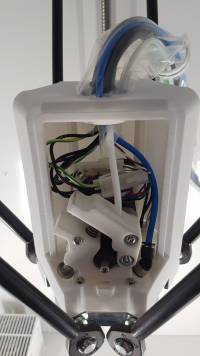
- Remove the print head cover.
- Pull the guiding hose out of its seat at the extruder head.
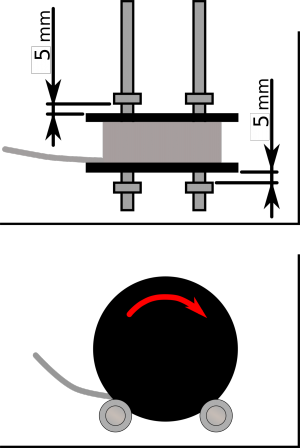
- Open the filament drawer and place the spool between the positioning clamping rings on the guide rails.
- The spool must run freely. If it is jammed in the clamping rings, adjust them by loosening the set screw and position them so that at least 5 mm of free space are on either side of the spool.
- The filament strand must point to the rear of the machine and come from under the spool as depicted.
- Insert the filament strand into the guiding hose and push it all the way up until it sticks out of the hose at the extruder head end.
- Close the filament drawer.
INFO
During pushing the filament through the hose you may hit some resistance. This is when you reach the inlet bushing into the build chamber and at the reducer from 4 to 2 mm diameter of the hose. Simply pull back the filament a few centimetres and push again until you find the strand run freely again.
Priming and preheating
Print Head priming
After material has been loaded the next step is priming the print head to ensure good filling of the nozzle.
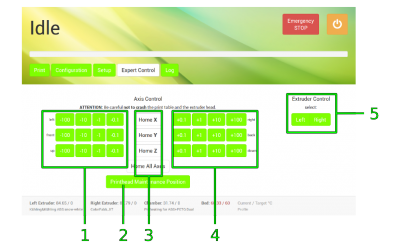
- At the operating screen, open the Expert Control screen.
- On the bottom side of the screen you will find buttons to heat the extruder.
- The starting temperature is displayed according to the selected filament profile (see Configuration).
- Set the extrusion temperature recommended by the manufacturer via the touchscreen keyboard. The temperature can be increased or decreased in steps of 10 °C (tap [++] / [- -] once) or 1 °C (tap [+] / [-] once).
- Tap [set] when the desired value is set.
The VP75 will heat to this temperature and then unlock the [extrude] and [retract] buttons. - Tap [extrude] to extrude 5 mm of filament (tapping repeatedly will extrude 5 mm per tap). Tapping [retract] pulls the filament 5 mm back for every tap.
- Watch the extrusion and check whether the following recommendations are visible:
- The filament is extruded smoothly in a single, clean strand.
- No bubbling or discoloration is visible. Bubbling or discoloration mean an extrusion temperature set too high.
If bubbling does not cease after reducing the temperature, this may also mean that the material absorbed moisture. It must then be dried thoroughly.
- The extruded strand is not swelling up after leaving the nozzle tip. Upswell means the temperature is too low and the internal friction of the material too high.
- No slipping of the print head drive gear is visible. Slipping of the drive gear indicates an extrusion temperature set too low and a too high frictional resistance in the nozzle.
- The material is not oozing excessively from the nozzle tip after finishing the extrusion and reducing the temperature.
- If these points are not met, adjust the temperature and extrude again until the correct appearance is visible.
- Tap [OFF] to deactivate the print head heating unless you want to keep the current extruder temperature for further steps.
Preaheating the print bed and the build chamber
- Check if the footer reads Preheating for Polymaker PC for the Bed/Chamber profile. The footer is the same on every page of the GUI. If otherwise, change the temperature profile as described in the Operating Manual.
- Activate the build chamber by tapping [Build Chamber ON]. The LEDs light up and all axes perform a home-positioning routine.
- Then start the heating by tapping [Preheat Chamber/Bed ON]. The temperature indicators in the footer now show both current and target temperature.
- Let the build chamber heat for approximately 45 minutes until the target temperature is reached.
- To verify the settings, print a sample model and check the extrusion properties. Adjust the settings if required.
Creating your first own print job
You will find all necessary installation and setup procedures required for the first production in the following paragraphs. All software mentioned additionally is available “Open Source”.
INFO
Kühling&Kühling recommend using the stated software. Using other software is up to the user but the manufacturer cannot be held liable for any malfunction resulting from use of other than the recommended software.
Installation and setup of the slicing software
First you need to install a slicing software on your computer to translate .stl-files (Surface Teselation Language - a 3D format with triangulated surfaces needed for processing) into printable G-codes.
Kühling&Kühling recommend using the Slic3r slicing software to prepare your digital 3D models for printing. This slicing software provides a lot of features necessary for achieving optimal results with the VP75 and has been thoroughly tested. Other software may be available but has not been tested.
To prepare for printing follow these steps:
- Download the latest Slic3r installation package for your operating system through the links listed in the Downloads section and follow the installation instructions provided in the corresponding software manual.
- Also from the Downloads section, download the latest preconfigured Slic3r profiles package for the VP75 to a prepared directory on your PC, and unpack the archive.
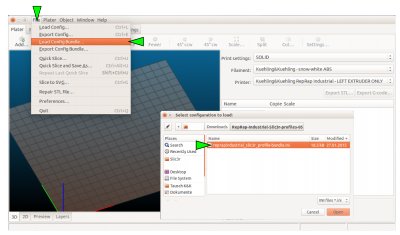
Make sure to download the correct package for your hardware and software. - In Slic3r select File > Load Config Bundle and choose the previously downloaded .ini file. Refer to the provided README.txt for a description of the different profiles available.
INFO
After installing Slic3r it is mandatory to switch into “Expert” mode before further plunging into utilization (described in the Slic3r manual).
INFO
When importing profile bundles into Slic3r, existing presets may be overwritten. It is recommended to backup your custom/modified presets by exporting them as a bundle first (File > Export Config Bundle).
Slicing the 3D model
The 3D model you want to print must be available as an .stl-file. Most common 3D modeling software is able to create this file format.
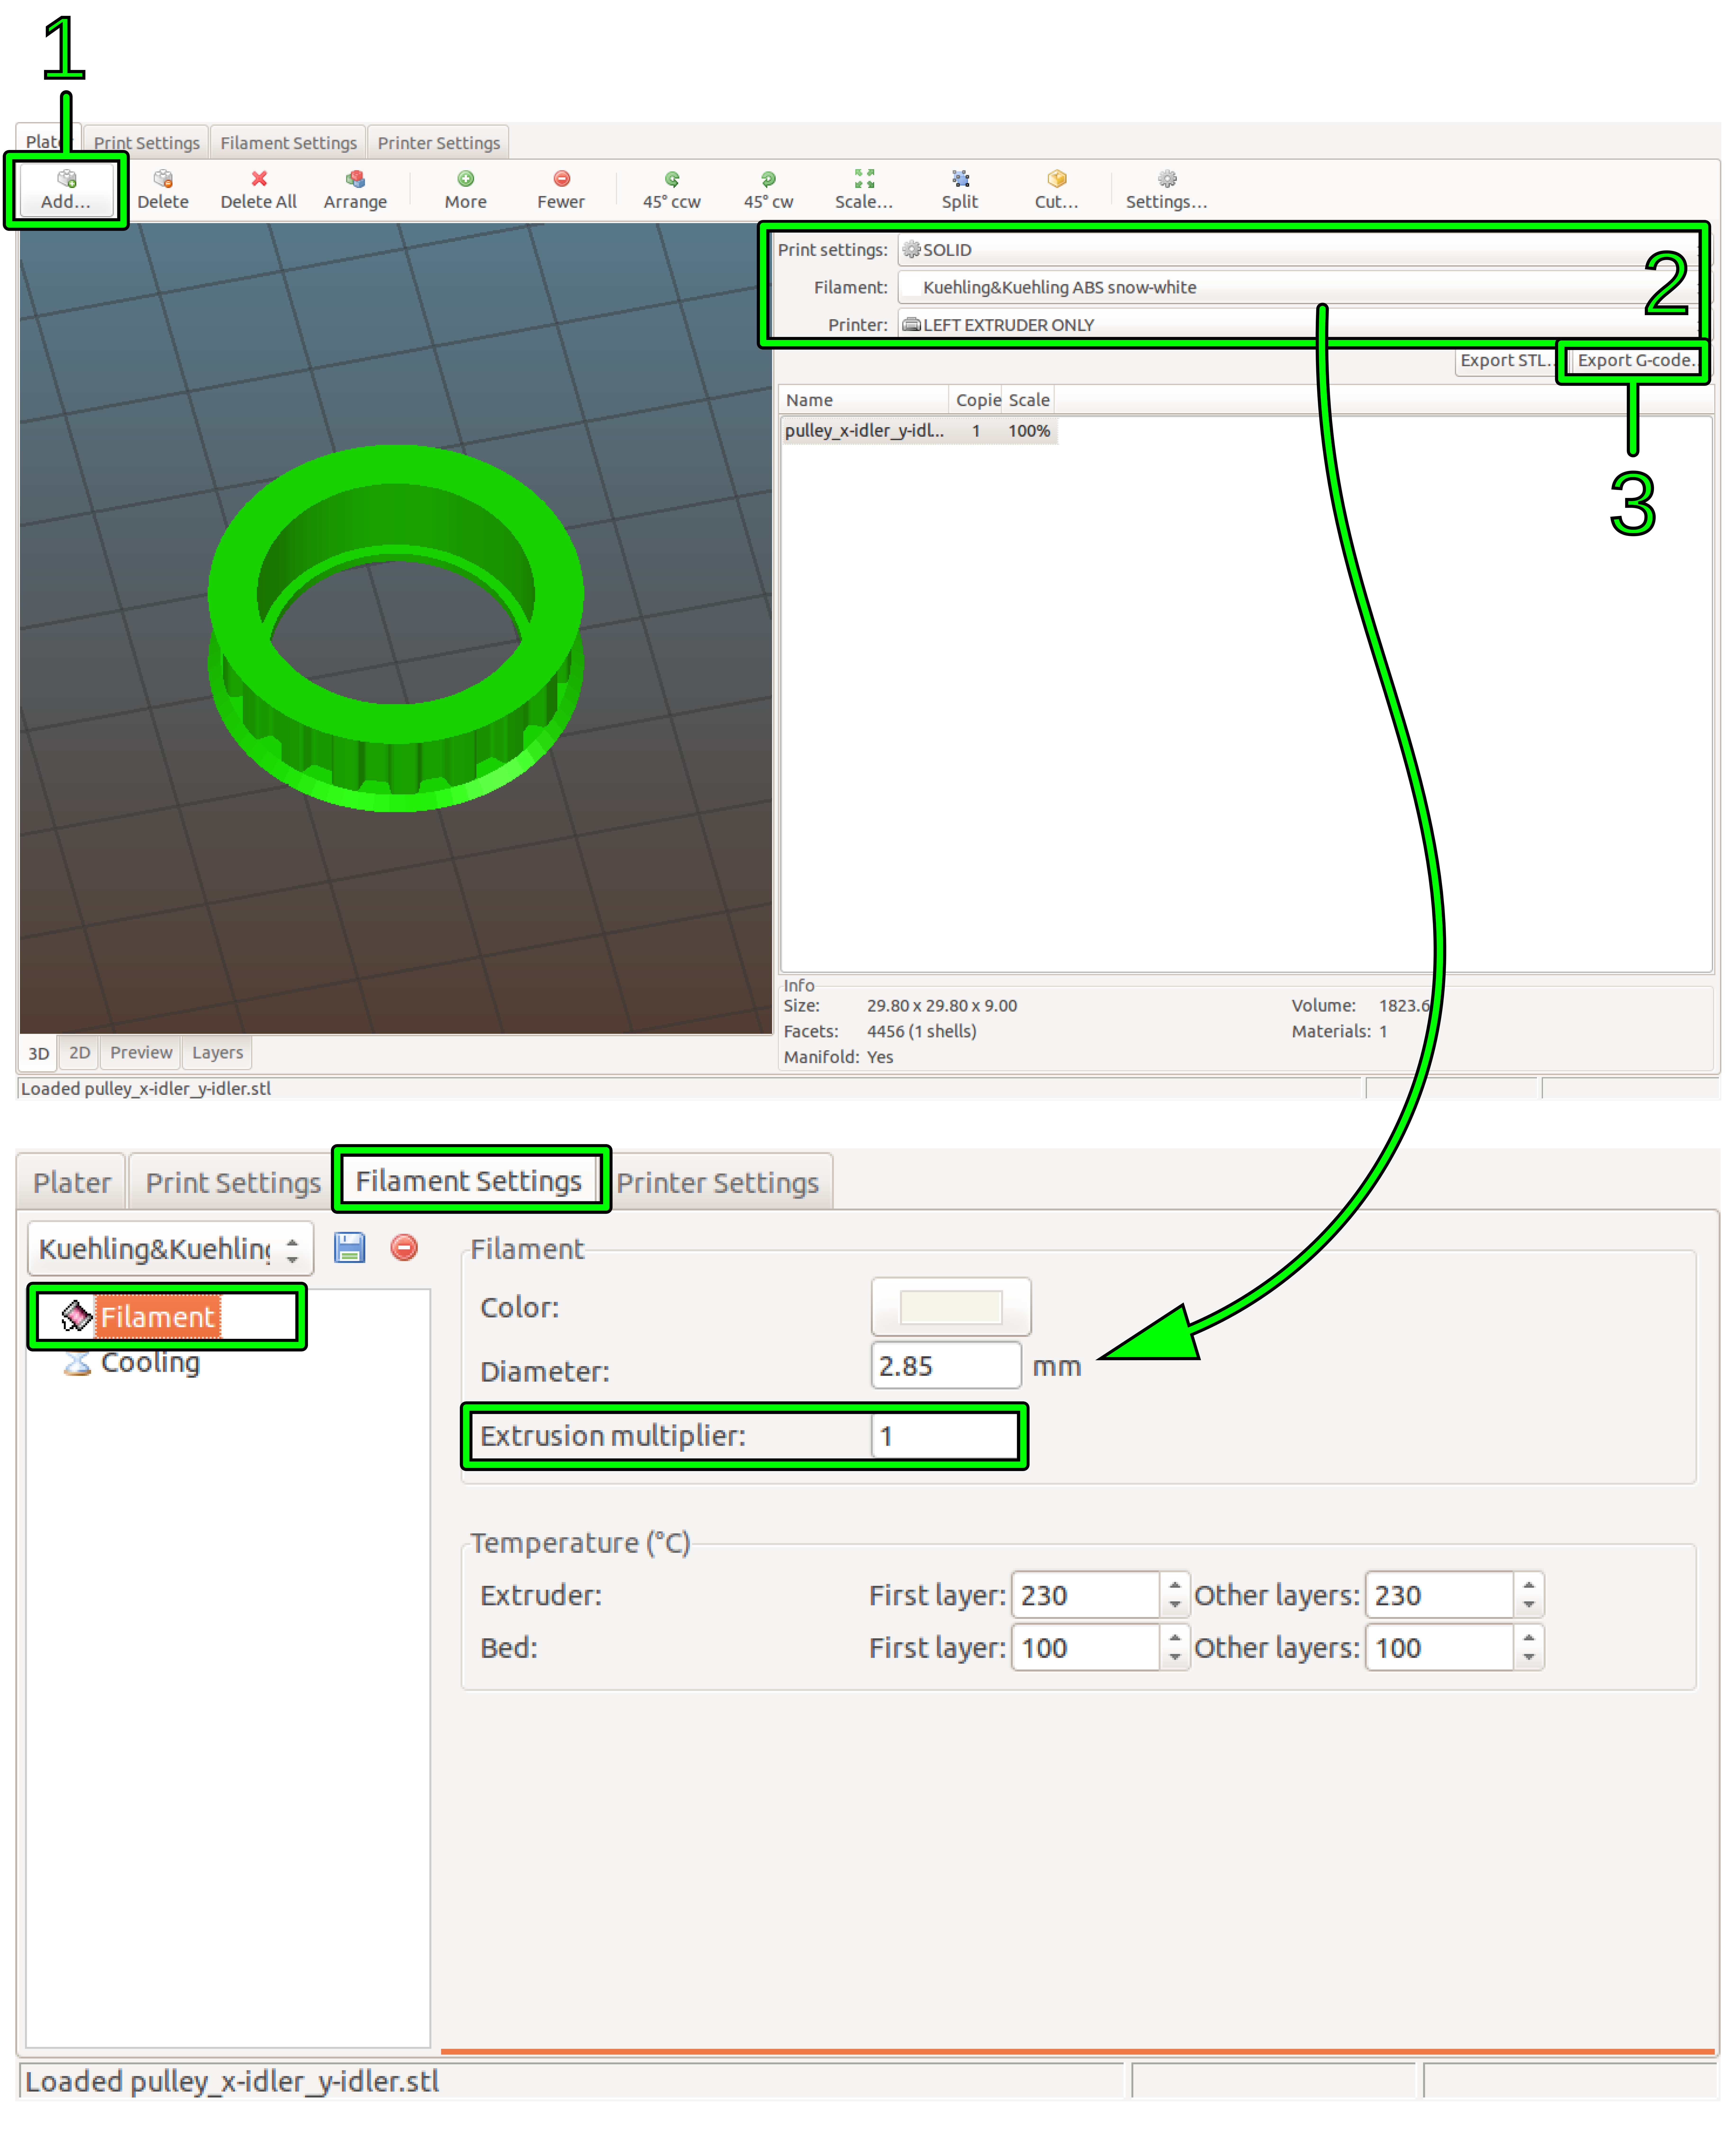
- Start Slic3r to process a 3D model into G-code data.
- Select the preconfigured profiles for filament, print and printer before generating a G-code file.
- Open the Filament Settings tab end enter the extrusion multiplier measured during calibration.
- Rename and save the filament profile.
- Export the G-code data.
Refer to the Slic3r manual for help on fine tuning any parameters for the printing process.
Starting the manufacturing process
Upload the G-code to the machine via the web interface as described in Queue.
Make sure that all previously described steps have been carried out.
The next steps are carried out at the operating screen:
- Tap the [print] button on the Print screen to start the manufacturing process.
- Wait until the VP75 has finished the process completely and all axes are in their home position, then remove the build plate, take off the test object and check whether all expectations have been met.
If everything has been fault-free, delete the part file from the queue - you are ready to proceed to production.
Removing objects from the build plate
DANGER OF BURNING!
The build plate and the build chamber heating resistor are not being switched off after a manufacturing process. Also, the extruder nozzle may still be too hot to the touch. Be careful not to burn yourself when removing the build plate.
NOTICE
To avoid scratching do not use pointed tools (e.g. screwdrivers) to remove the object from the build sheet.
If residues of the print material remain on the build sheet, use a very sharp, flat mounted blade to scrape the surface clean.
Scratches in the build plate's surface may lead to enforced adhesion of prints. Severely scratched or broken build sheets can no longer be used for production and must be replaced.
To remove objects from the build sheet let it cool down to room temperature; larger parts should remain in the switched off build chamber until cooled down.
With materials suited to being printed on PEI the part will loosen itself from the build plate when cooling due to shrinkage which can be heard by the crackling noises. If otherwise, twist and bend the build plate until the object comes free.
Find more information about the properties and handling of the PEI build sheet in the parts description of this manual.

